Creating Courses
Regular accounts (Courses and students populate automatically with Clever-synced accounts)
After signing up for E4Effort, you can create your first Course. Elementary teachers who see the same students all day may want to combine Courses to represent two or more learning periods. For example, Course 1 = Before Lunch and Course 2 = After Lunch; or combine subjects, Course 1 = Lang. Arts/Sci, Course 2 = Reading/Art, etc.
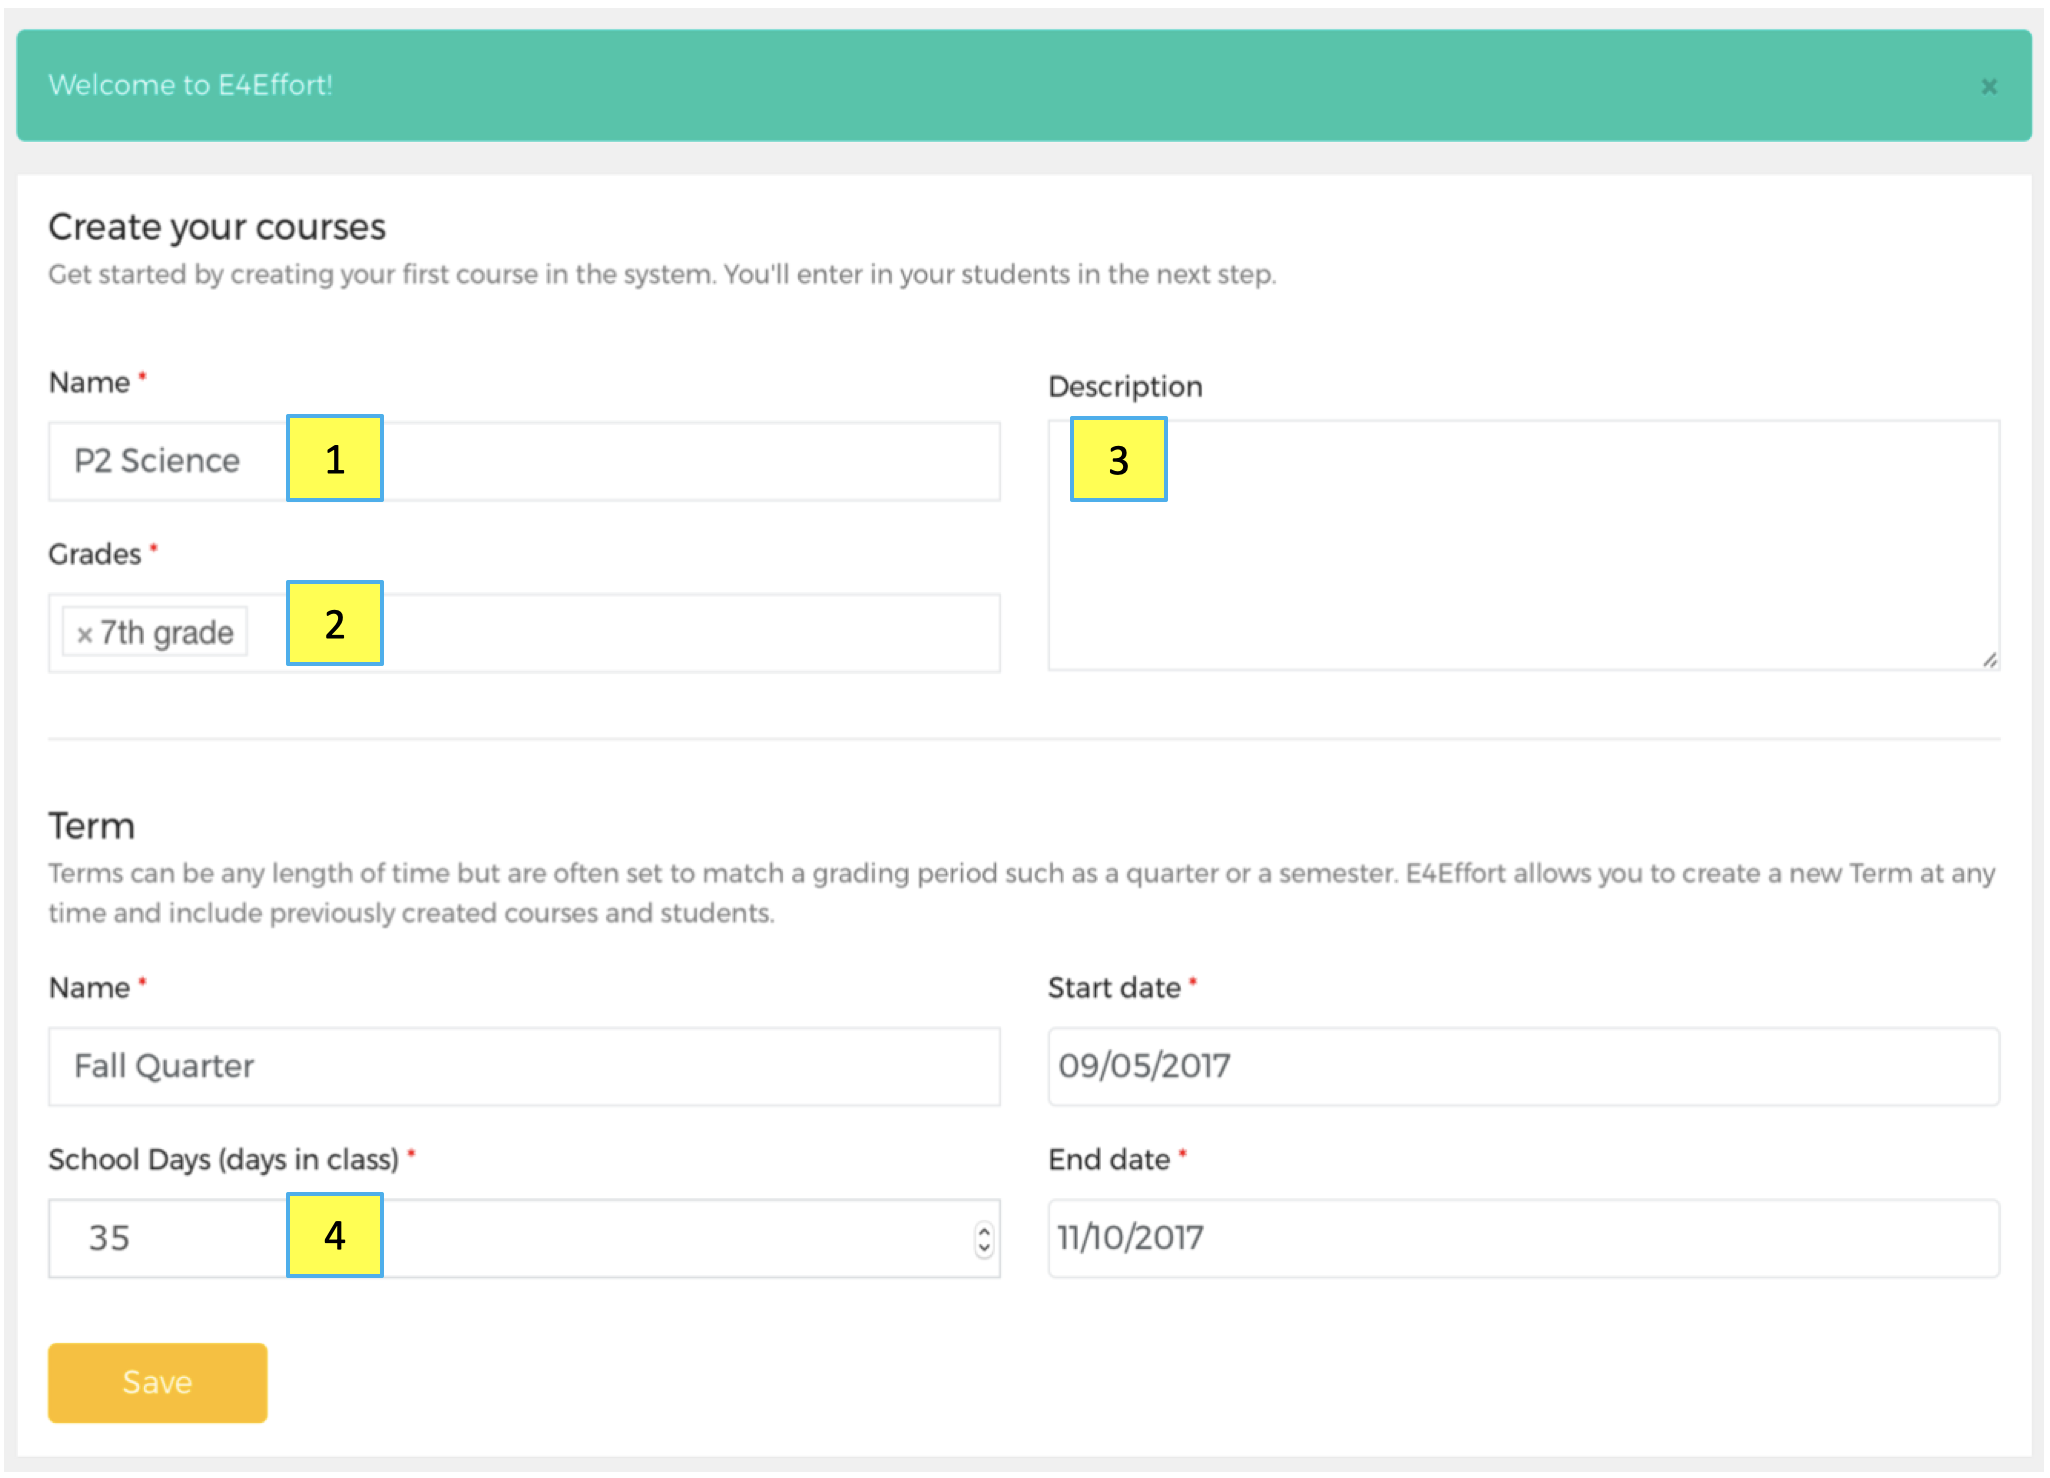
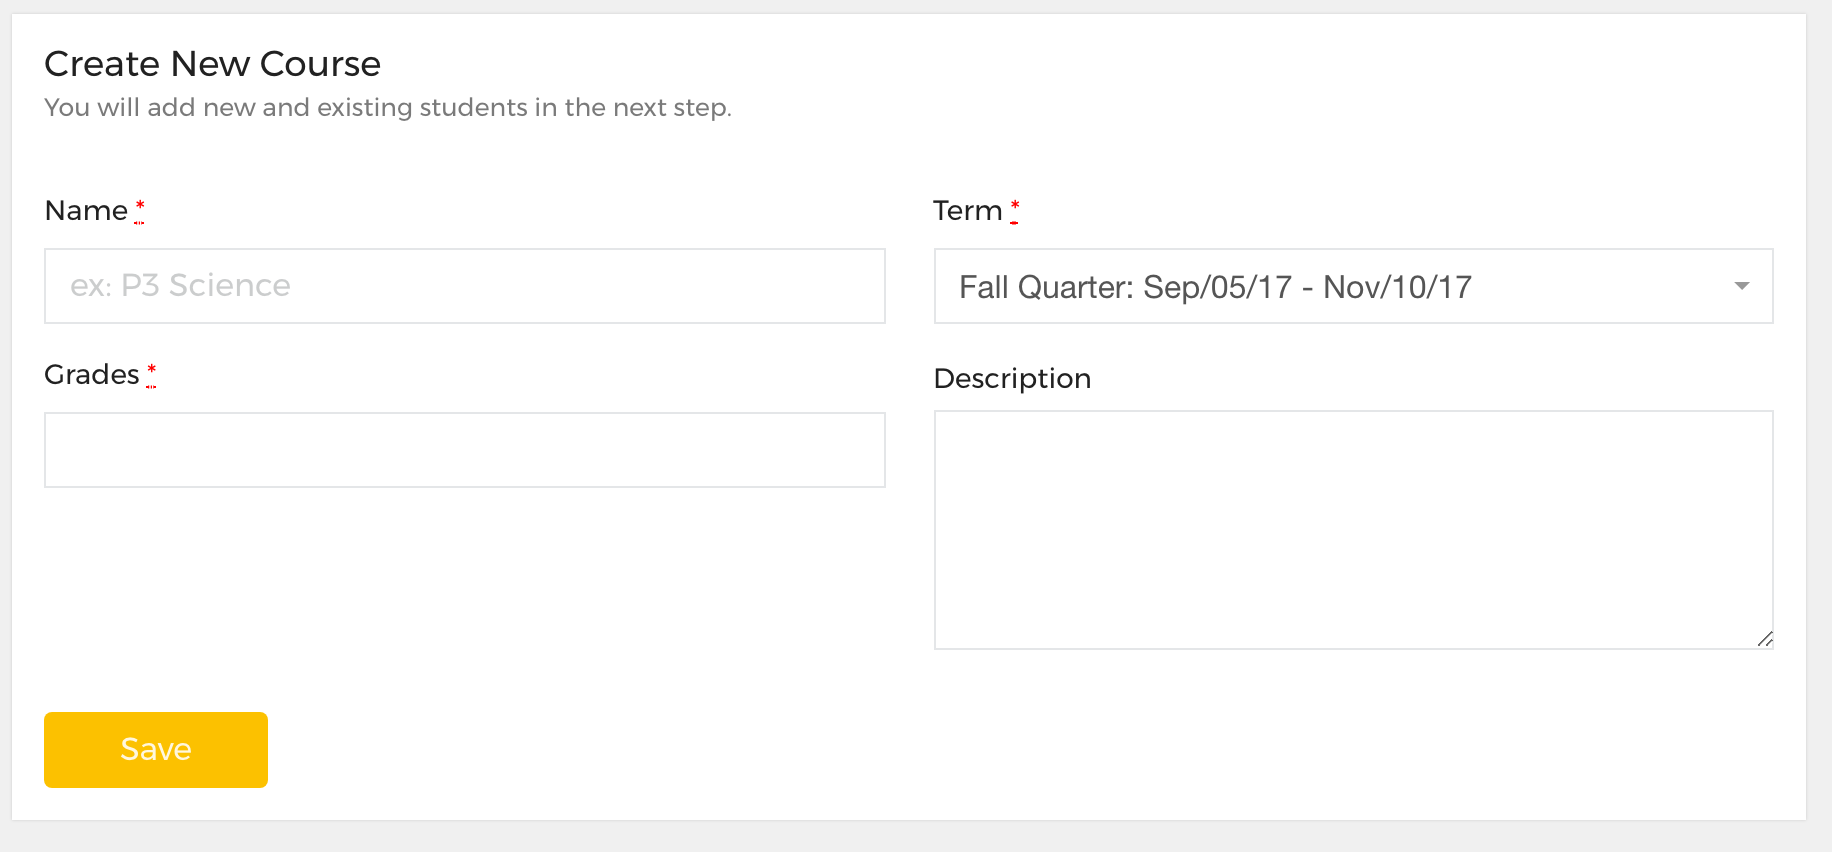
Information to create your courses (each item number is shown in the image below)
- Name – to have your Courses listed by class period in the Teacher Dashboard and Scoring App, include the period number as part of each Course title (e.g. P1 Advisory, P2 Social Studies, P3 Social Studies, etc.).
- Grades– select the grade or grades that you teach.
- Description– optional
- School Days– estimate the number of class days that occur within the start and end dates of the Term. School Days are used to set the number of Effort Challenges*.
*Effort Challenges: program code checks, after 5 days of scoring, to see which students deserve achievment badges for meeting minimum milestone requirements in any effort category. If milestone is met, achievement badge is sent to the Student Portal Achievements page. For a visual, see the table that shows Efort Challenges by number of class-days at the top of the article about How to create a new Term.
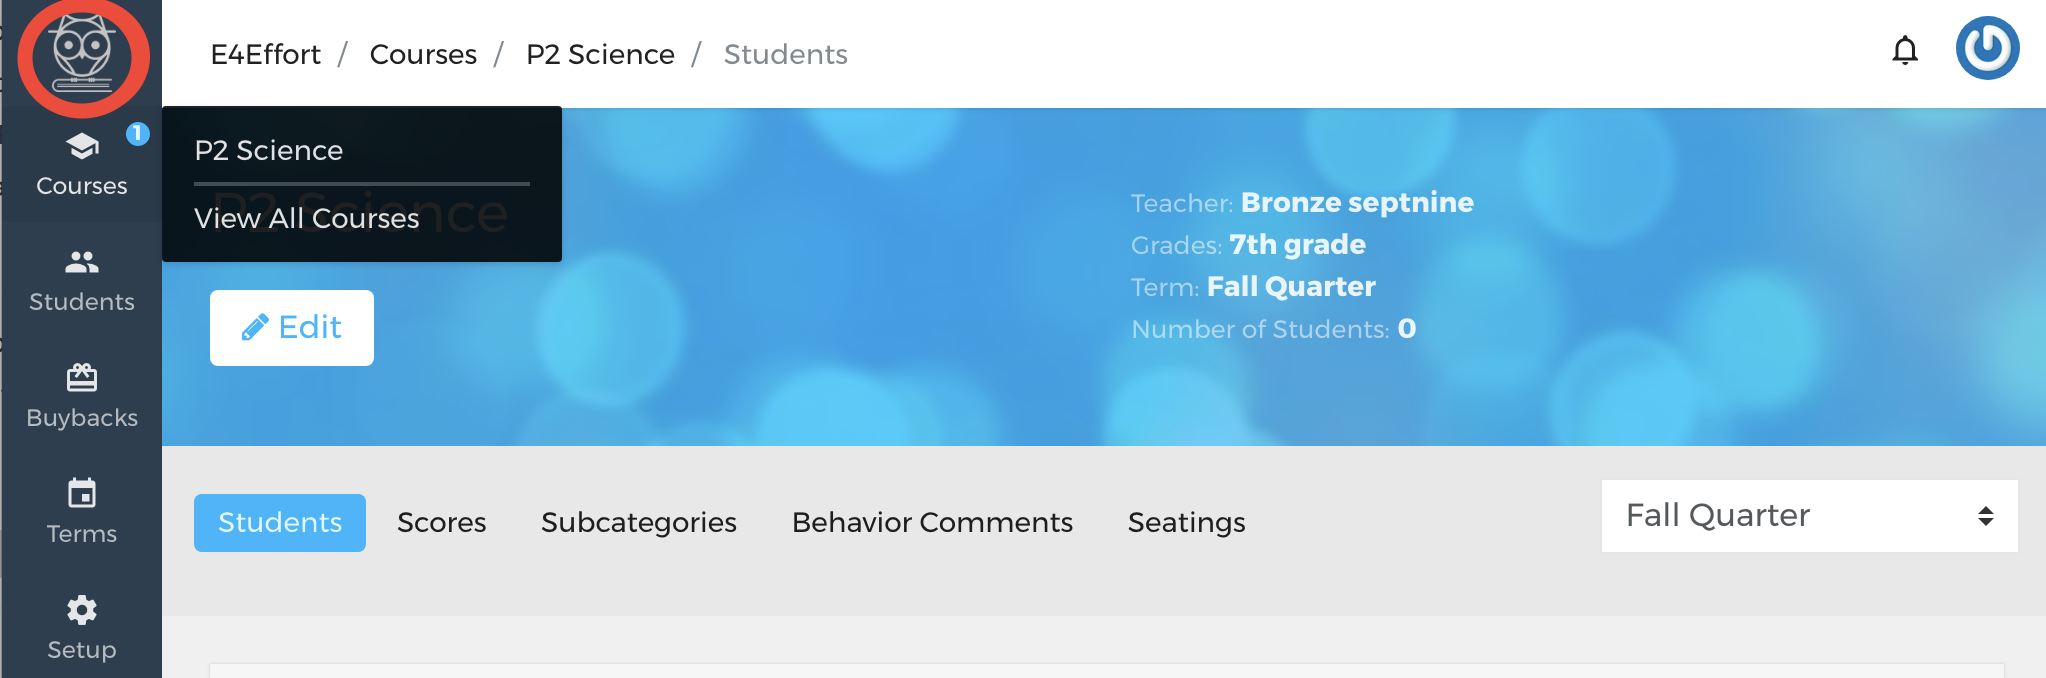
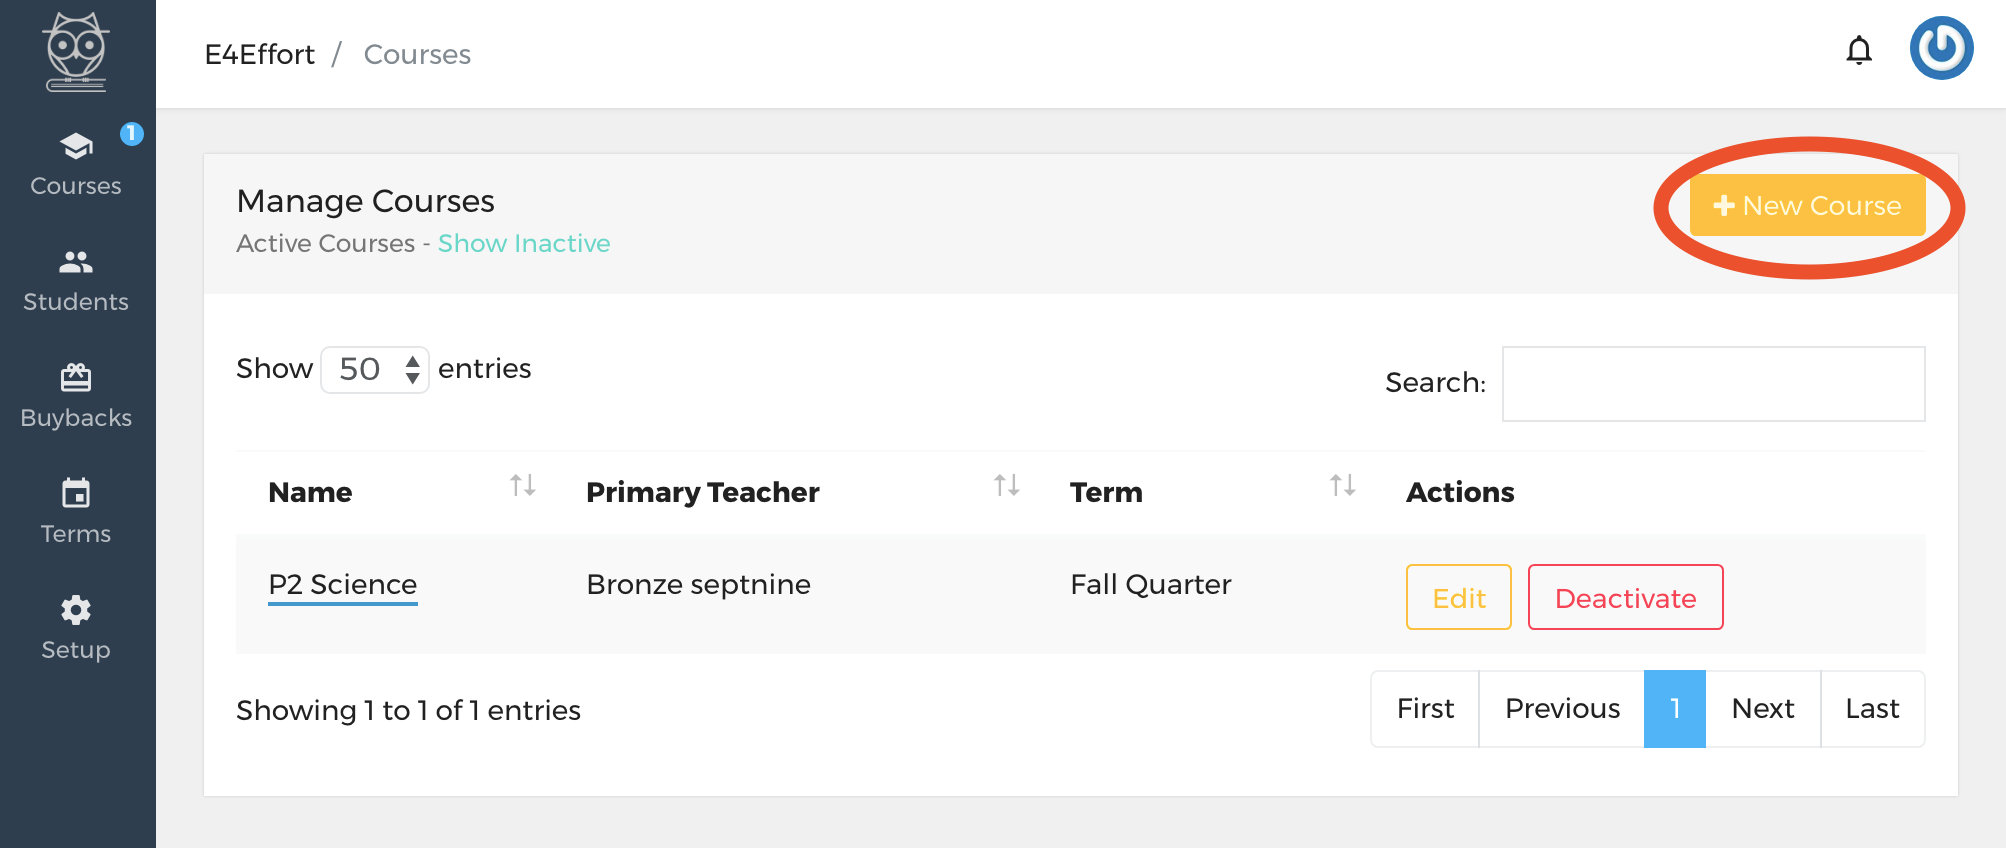
To create more Courses, click on the owl or select “View All Courses” from the Courses side tab.
If you want a different Term for a Course, go to the “Terms” button on the side panel and choose [+New Term].

The Basics / related articles and screencasts:
- Obtaining the Teacher Scoring App
- Creating Courses
- Adding Students to Courses
- Change student schedules – Regular acct.
- Update class rosters – Clever-synced acct.
- Create a new Term
- Change Category Weights
- Forgot password /change email or password
- Manage your subscription
Articles are relevant for all three subscription plans (Bronze, Silver, and Gold).