Beginner’s Guide
STEP 1: Sync roster (Clever-synced Accounts) OR enter Courses and Students (Regular Accounts)
I. Sync your roster via Clever Library (Clever-synced Account)
Clever-synced Accounts – Note to elementary teachers, and other teachers who teach many different subjects to the same students, you can make E4Effort easier to use by choosing 1 or 2 Courses to do all your effort scoring. See I. B, below.
Another solution is to replace your Clever-synced account with a Regular Account. This will allow you to create your own Courses. For example, Sec 1 B L (Before Lunch), and Sec 2 A L (After Lunch). To sign up for a Regular Account, go to our sign up page, use a non-school email address, and select the blue “Sign Up” button.
A. Steps to sync your Courses and Students using the Clever Library
- Go to https://clever.com and sign in as a teacher or go to sign up and choose the “Log in with Clever” option.
- Select the “Library” tab, then “Classroom Management” and then “E4Effort.”
- Select “Install E4Effort” and the “Allow and continue” buttons.
To see these steps click on the video link below:
B. Teachers who teach more than one subject to the same students…
can make E4Effort easier to use by choosing 1 or 2 Courses for all of your effort scoring. When you see the same students all day it’s difficult to remember to keep switching Courses on the app. Additionally, having just one or two Courses helps with the Participation category because student participation will be equalized over a larger segment of your school day.
Course names in Clever-synced accounts are unchangable. To reduce your number of courses to one or two, use the Manage Courses window in your Teacher Dashboard.
- To get to the Manage Courses page, click on the Owl (#1 in the image)
- Decide on 1 or 2 courses to leave active
- Use the Deactivate button (#2) to move all other Courses to your inactive list
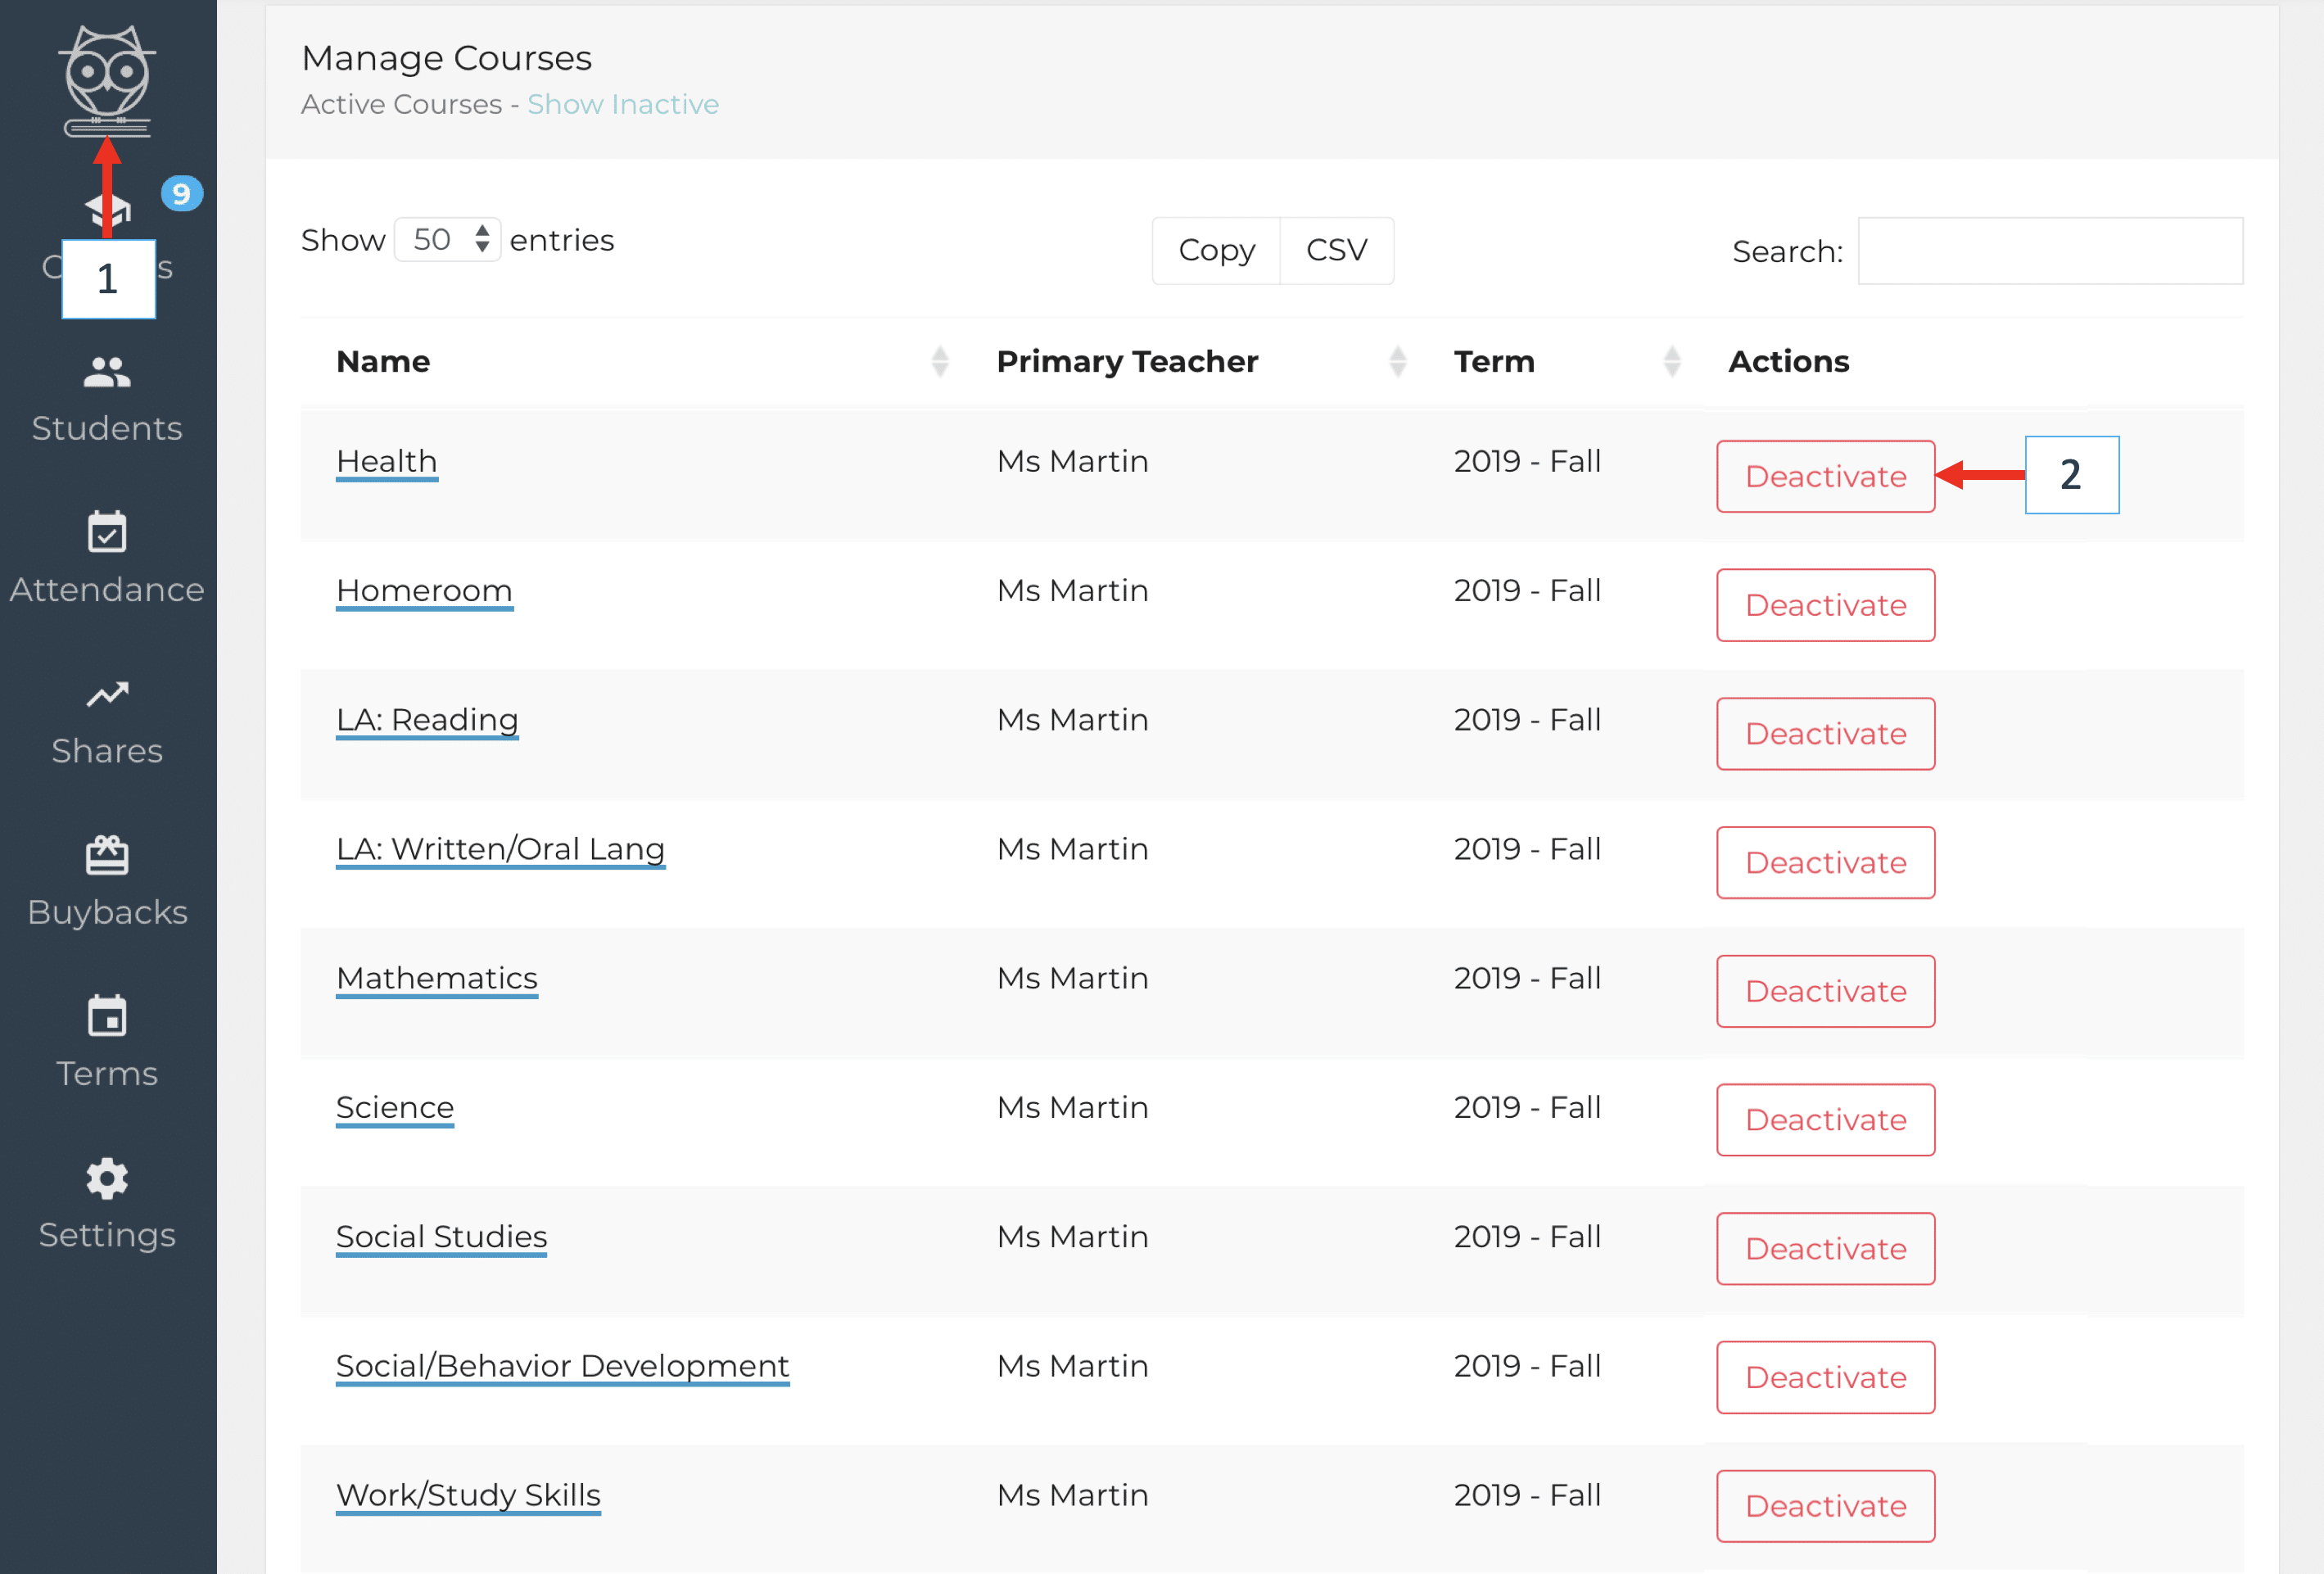
The next image shows that the teacher has deactivated all Courses except their morning Mathematics course and their afternoon Social Studies course. To activate deactivated Courses, click on the Show inactive button (#3).
Note: You can use the Subcategory feature to give titles to learning activities in the On Task category. For example, even though you are in the Course “Mathematics,” you can create a Subcategory titled “Science.” This will allow you to assess student effort more specifically by course. This is also helpful for parent teacher conferences and staff meetings (RTI, PBIS). The categories of Participation and Behavior also allow Subcategories to be created. See the article Creating or editing Subcategories in the Help Center.

II. Enter your Courses and Students (Regular Account)
Teachers who teach many different subjects to the same students can make E4Effort easier to use by doing all your scoring in 1 or 2 Courses. When you see the same students all day it’s difficult to remember to keep switching Courses on the app. Additionally, having just one or two Courses helps with the Participation category because student participation will be equalized over a larger segment of your school day.
A. Creating Courses
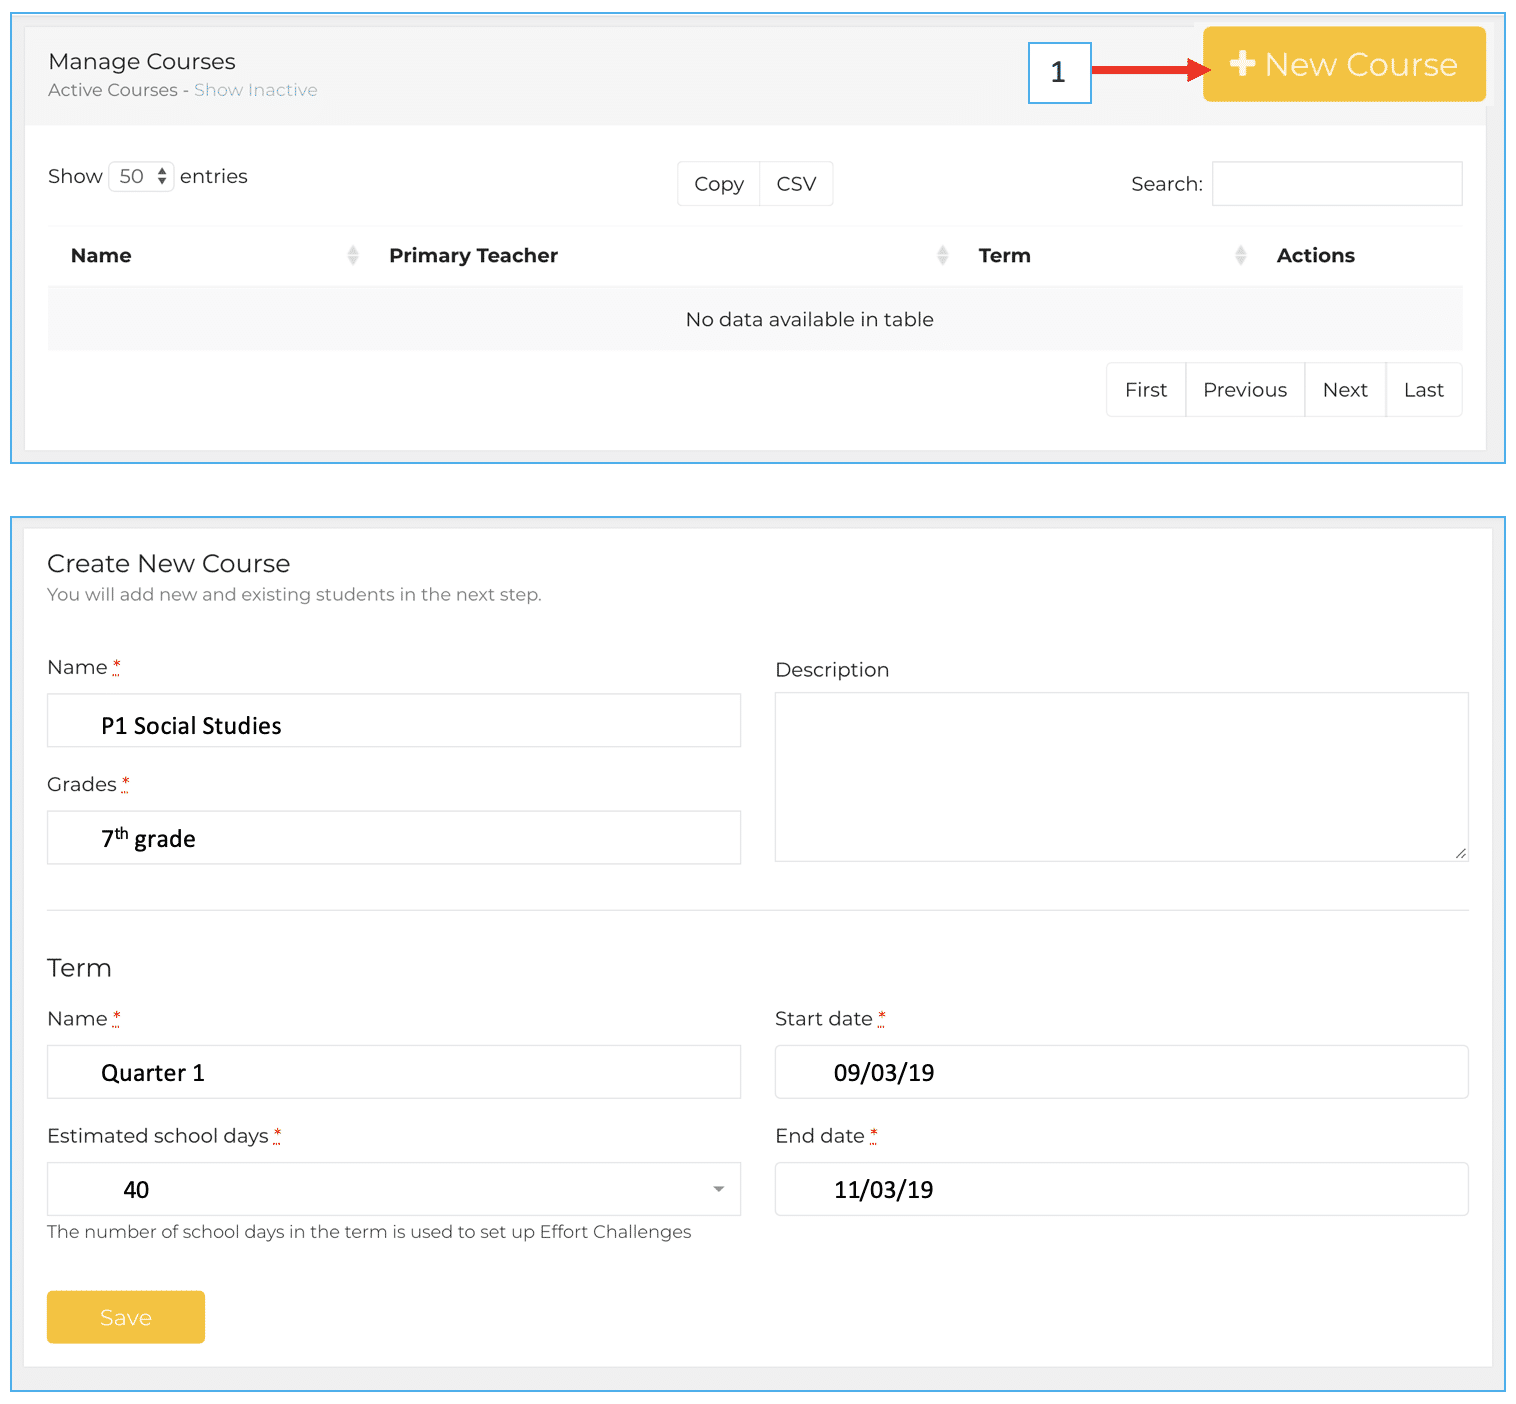
- After signing up, the Teacher Dashboard will open to the “Manage Courses”
- Select the “+New Course” button (see #1 in image)
- Fill in in Course information (to have your Courses listed by class period, include the period number as part of each Course title (e.g., P1 Advisory, P2 Social Studies, P3 Social Studies, etc.)
- When you create your first Course, you will also create a Term
- Give the Term a name and start and end dates
- “Estimated school days” is used to organize the Effort Challenge badges that are automatically awarded to students meeting effort percentage minimums every 5 days
- It is better to underestimate the number of days than to overestimate
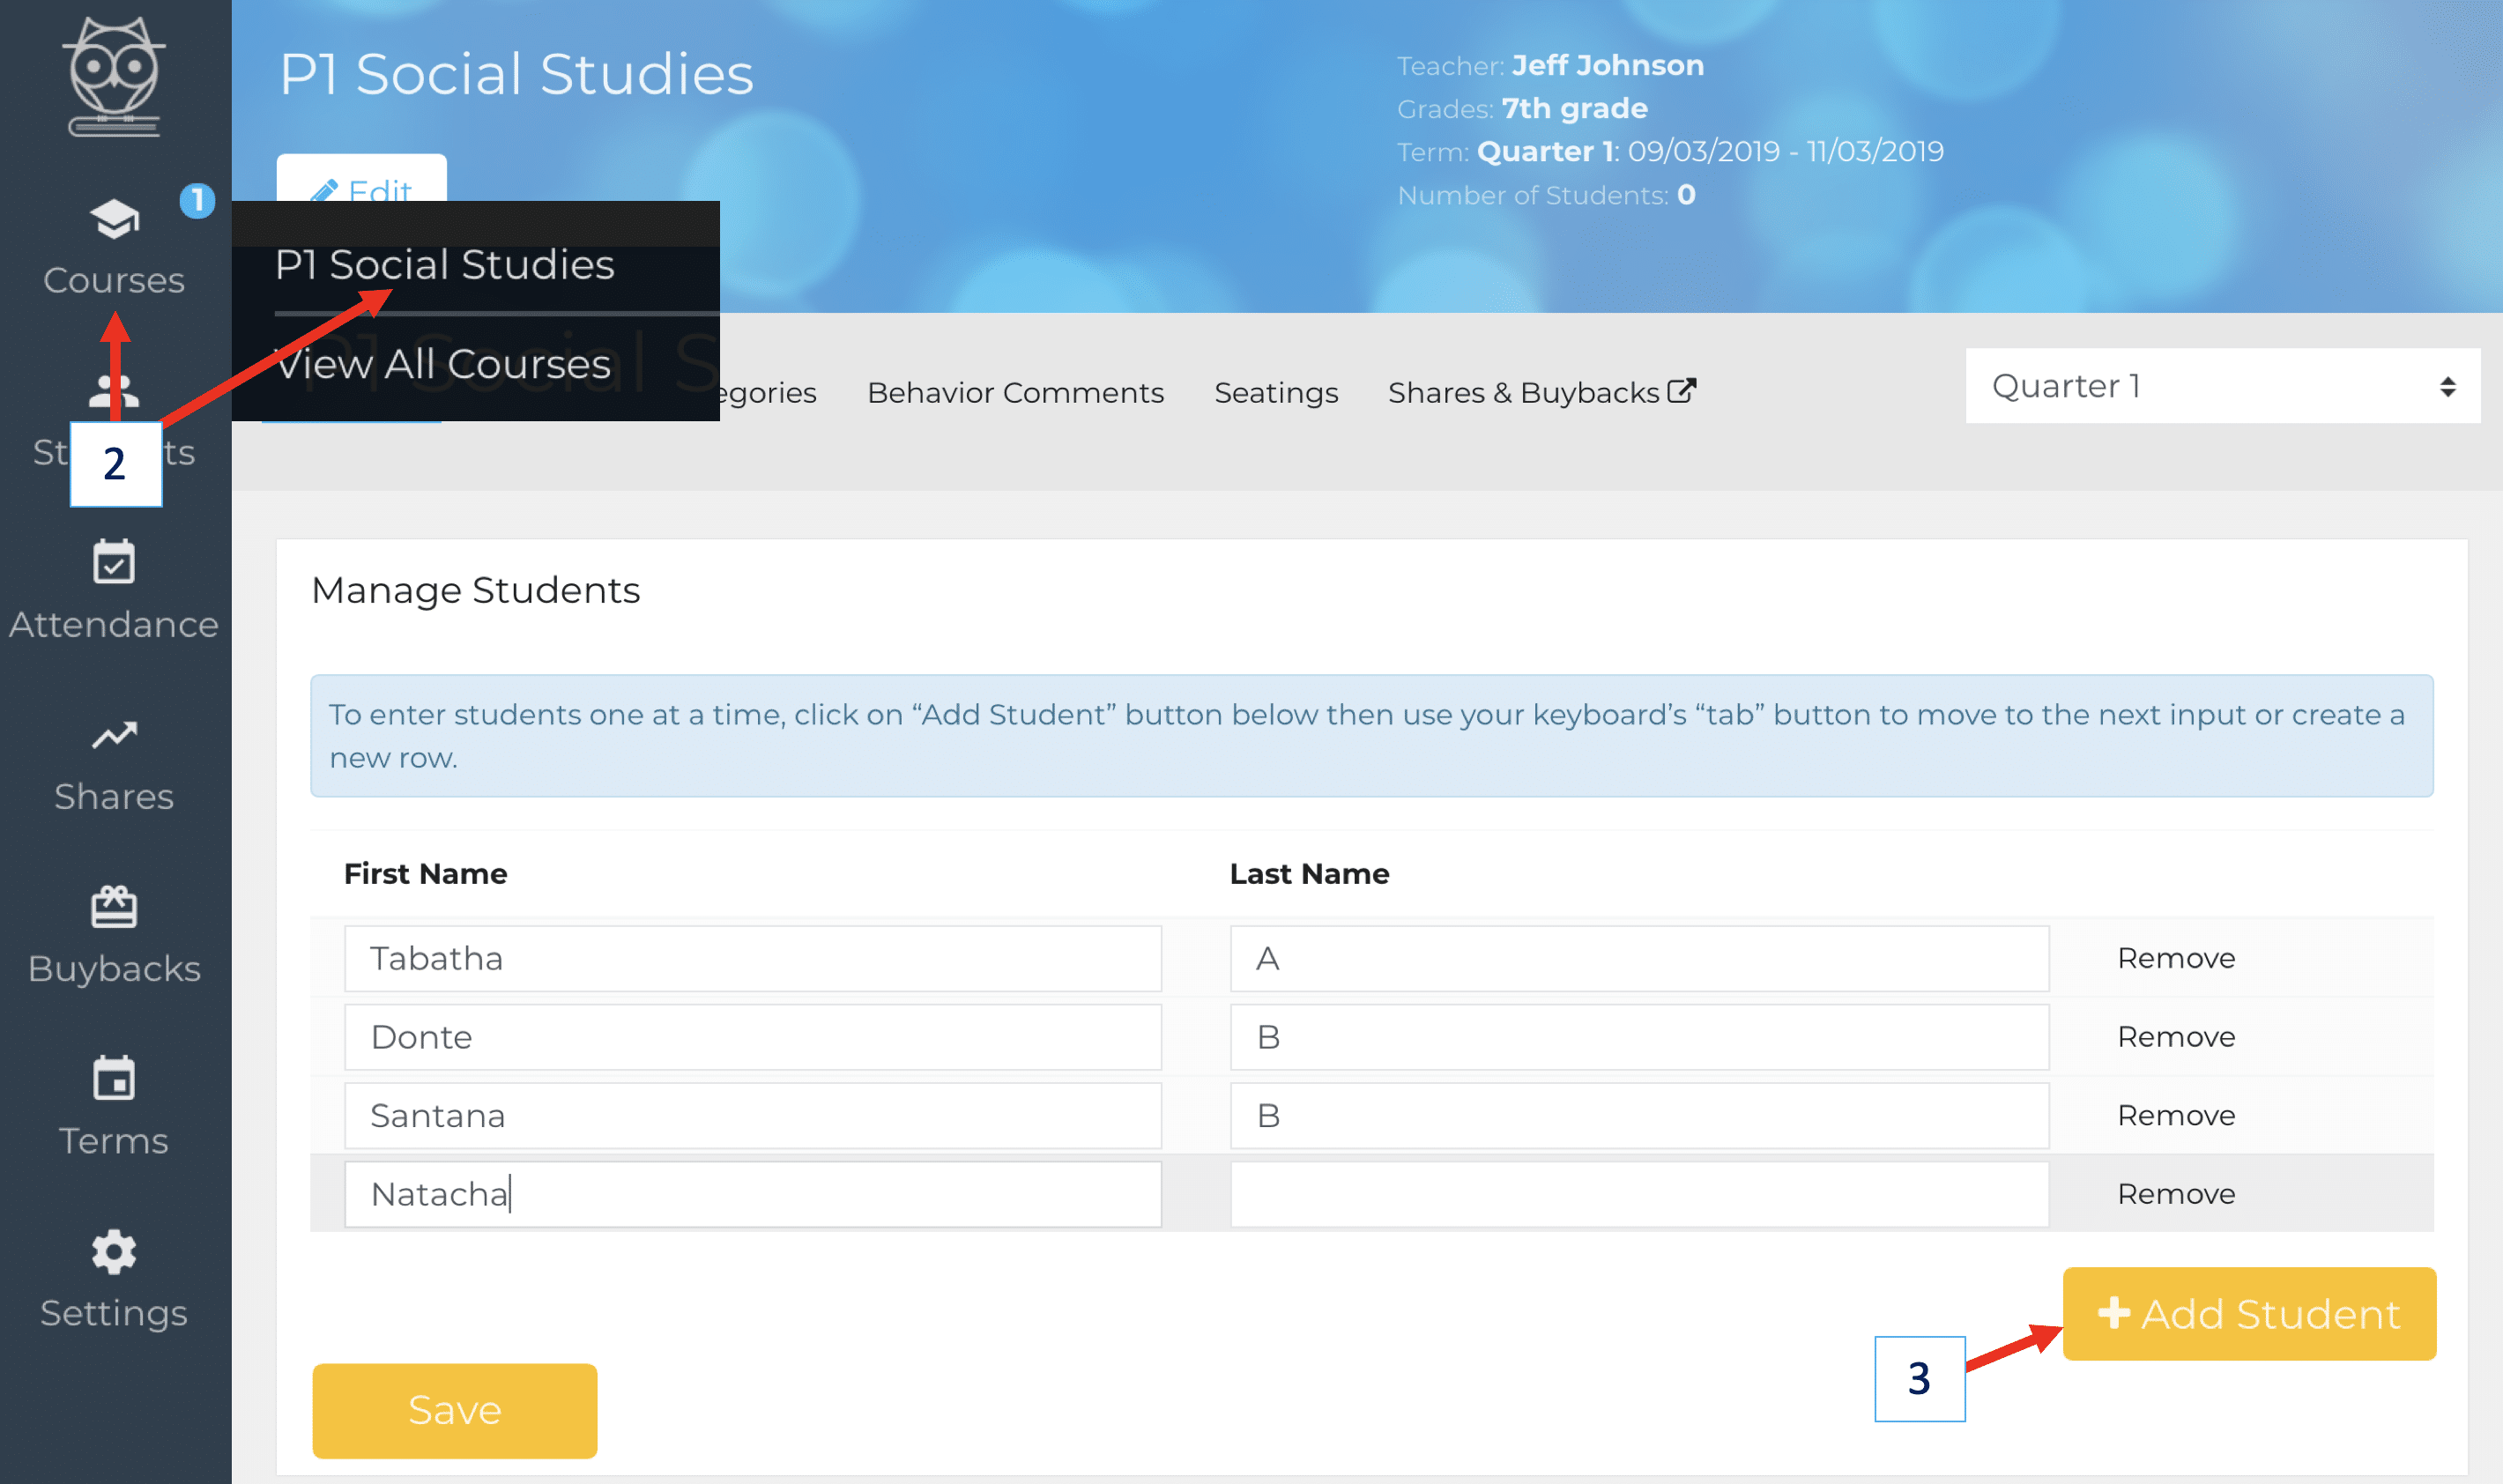
- To create more Courses, click on the Owl at the top of the side-panel or select “View All Courses” from Courses on the side-panel, then select “+New Course”
B. Adding Students
- Choose a Course (#2) and then the “Add Students” button (#3)
- If you have students entered already, first select the “Manage Students” button then “Add Students”
- A First Name window and a Last Name window will appear
- Type the first name of student X and hit the tab key on your computer
- Type the last name of student X and hit tab key (a new row will appear)
- In this way you may type all students for one Course without using your mouse or track pad to navigate to the Add Student button
- Click the “Save” button when you finish adding students to the Course.
- If none of your students have more than one course with you, repeat the steps of creating Courses and adding Students
- If you have one or more students for multiple courses, continue on to section II C
C. Adding one or more previously created students to an existing or new CourseClick in the window below “Add existing students to this course” (#4)
- Select the student or students you wish to add
- In the image, Alane, Alfredo, Bobby, and Casey have been selected and Charlie is about to be added
- When you are done adding students, scroll down to the end of your student list and press the Save button
- If you are creating a new Course and you want to add all previously entered students, click “Select All Active Students” (#5)
- You may remove one or more students by clicking the “X” next to their names (#6)
- Remember to click the Save button
